码垛
You can accomplish automated palletizing using the palletizing plugin. The palletizing plugin will help you create a palletizing program quickly using a visual and intuitive interface.
This example will guide you through the steps required to go from a basic palletizing station to a simulation, and finally to a real robot program you can load and execute in a robot controller.
您应该将托盘插件加载到Robodk中,以启用托盘功能。
按照以下步骤启用托盘插件:
1.SelectTools➔Plug-Ins。
2.Double click on the插件如果未启用。
You should see the码垛菜单中的输入和工具栏中的新托盘图标。
要创建一个托盘项目,您首先需要在Robodk中正确设置车站。
Follow these steps: to properly setup your station:
1.You should load a robot, a tool (TCP), a refence frame to pick the box (Pick_Frame), and a reference frame to build your pallet on (Pallet).
2.我们还建议您导入要堆叠的盒子和要堆叠的托盘。另外,您可以在Robodk库中找到标准尺寸的框。
3.The pallet must be aligned with the X+ and Y+ axes of the stacking frame (Pallet).

The palletizing wizard requires you to provide a subprogram to pick a new box and a program to drop the box. We recommend you create those first.
Follow these steps to create a pick program (Pick_Box) and a drop program (Drop_Box):
1.Create a选择目标你将选择新的输入框。我们也recommend you add an approach point.
2.Create aPick_BoxandDrop_Boxprogram.

The palletizing project will help you automate the robot palletizing process. This section describes the main features of the palletizing settings you can customize.
Follow these steps to create a palletizing project:
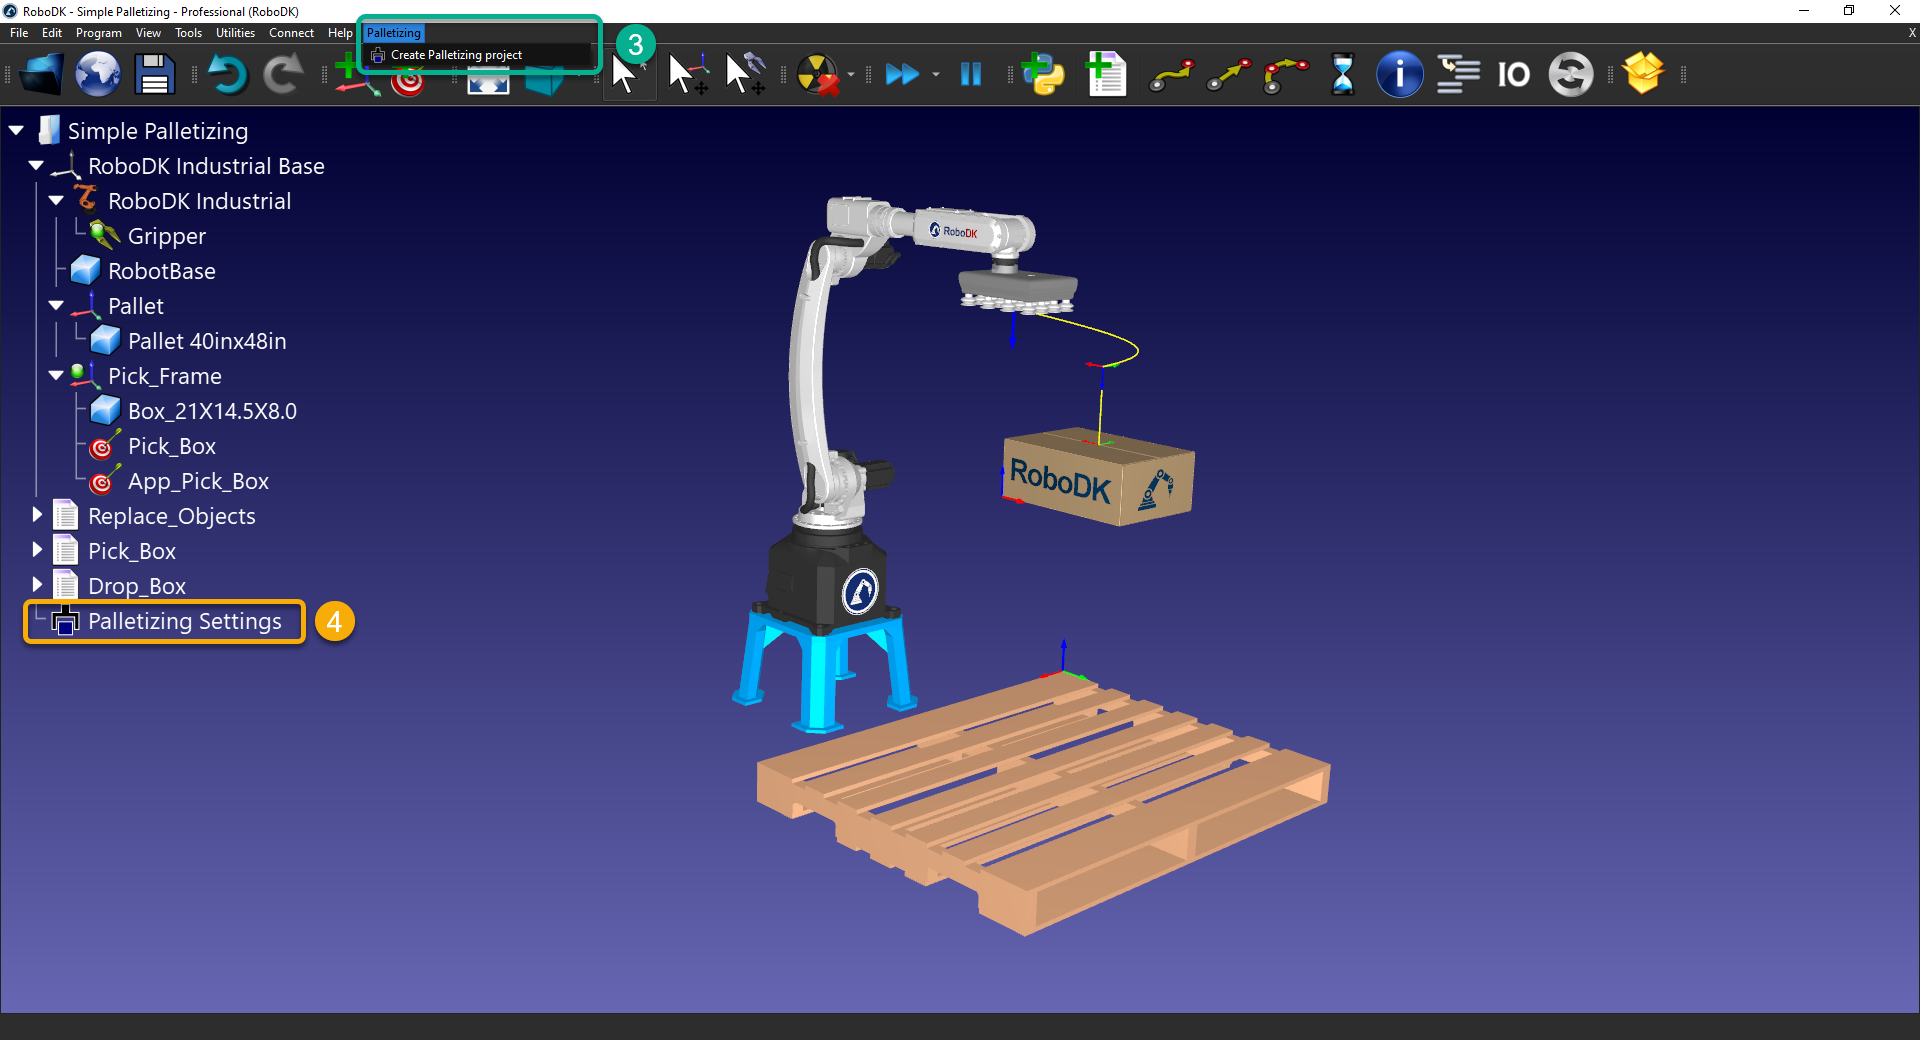
3.通过选择启用托盘插件Tools➔Pluginand activate the托盘插件。You can then select码垛in the main menu and selectCreate Palletizing Project。
4.双击码垛设置in your station tree.
当您打开托盘菜单的主要接口时,您可以选择拥有托盘项目,去货架或进程设置(包括两者)。
请按照以下步骤设置您的托盘项目:
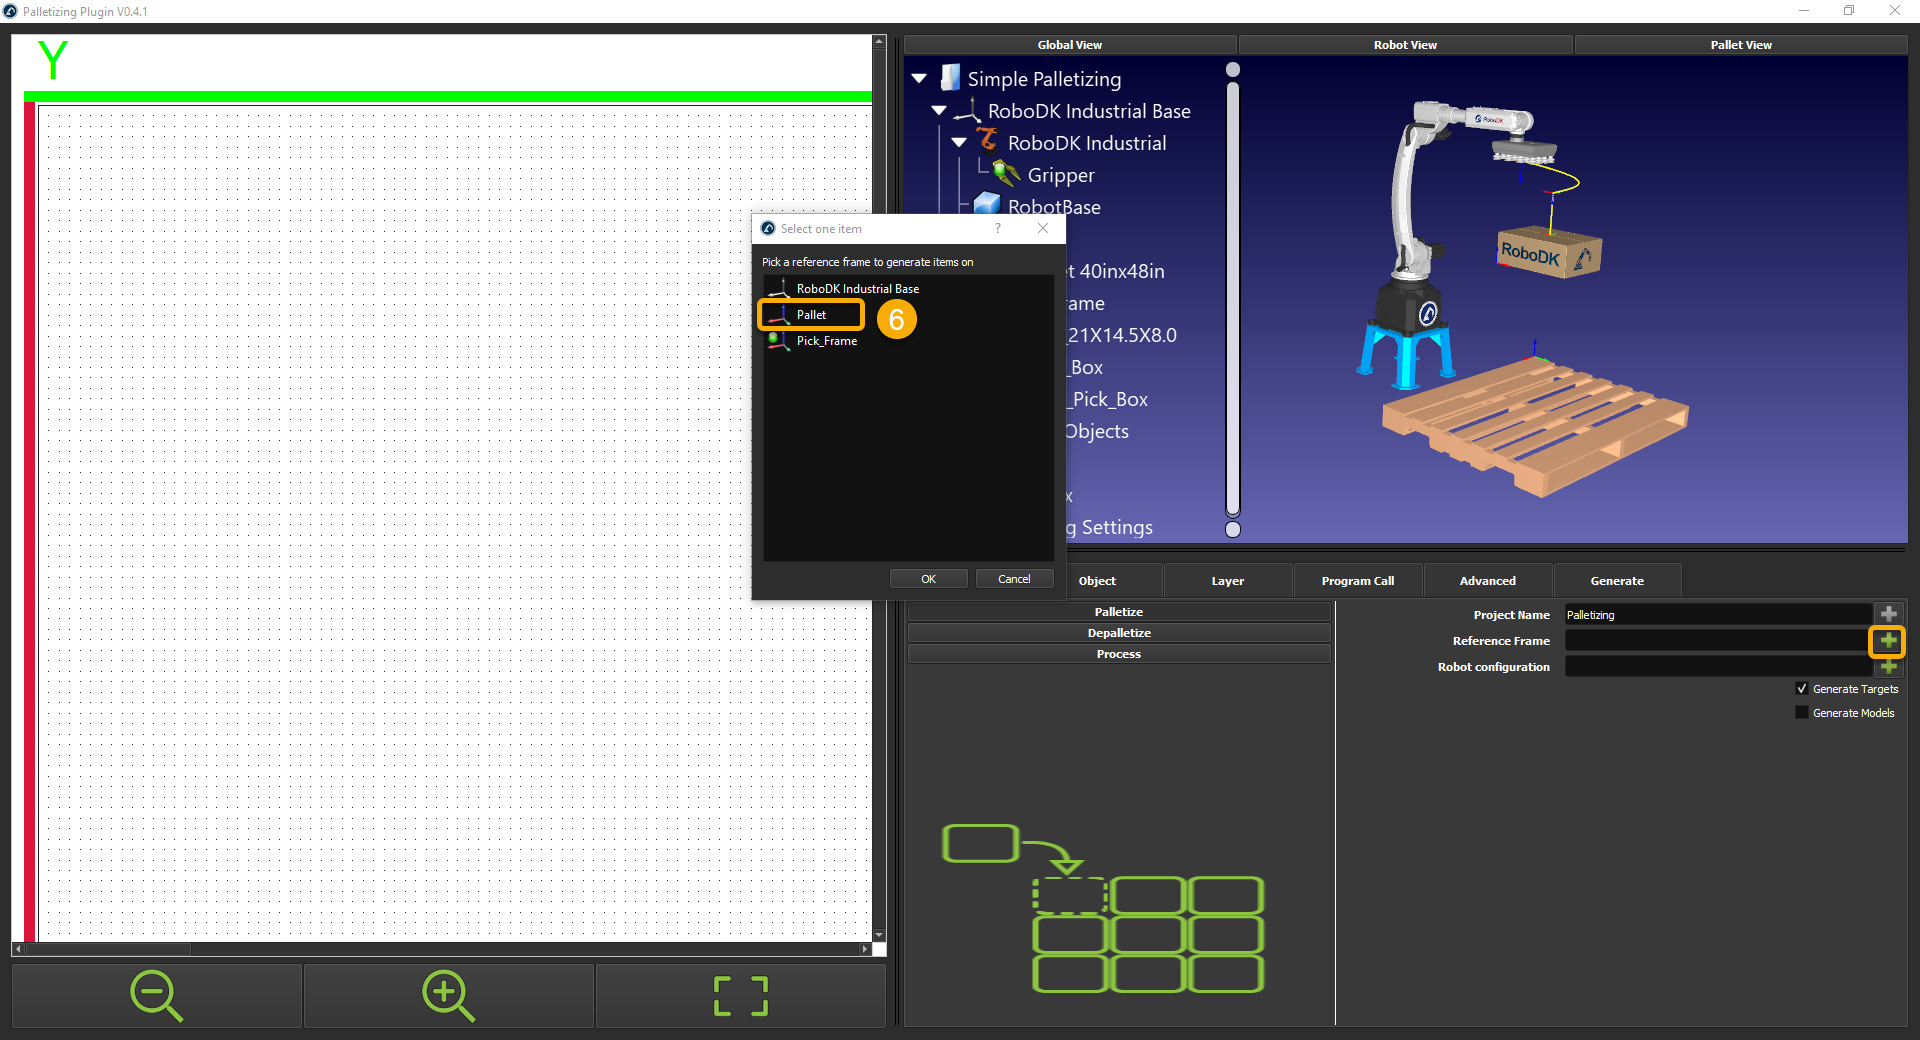
5.Select the码垛option.

6.选择您希望堆栈帧,盒子; In this case,Pallet。您可以直接键入框架的名称,也可以使用“+” button to select it from a list.
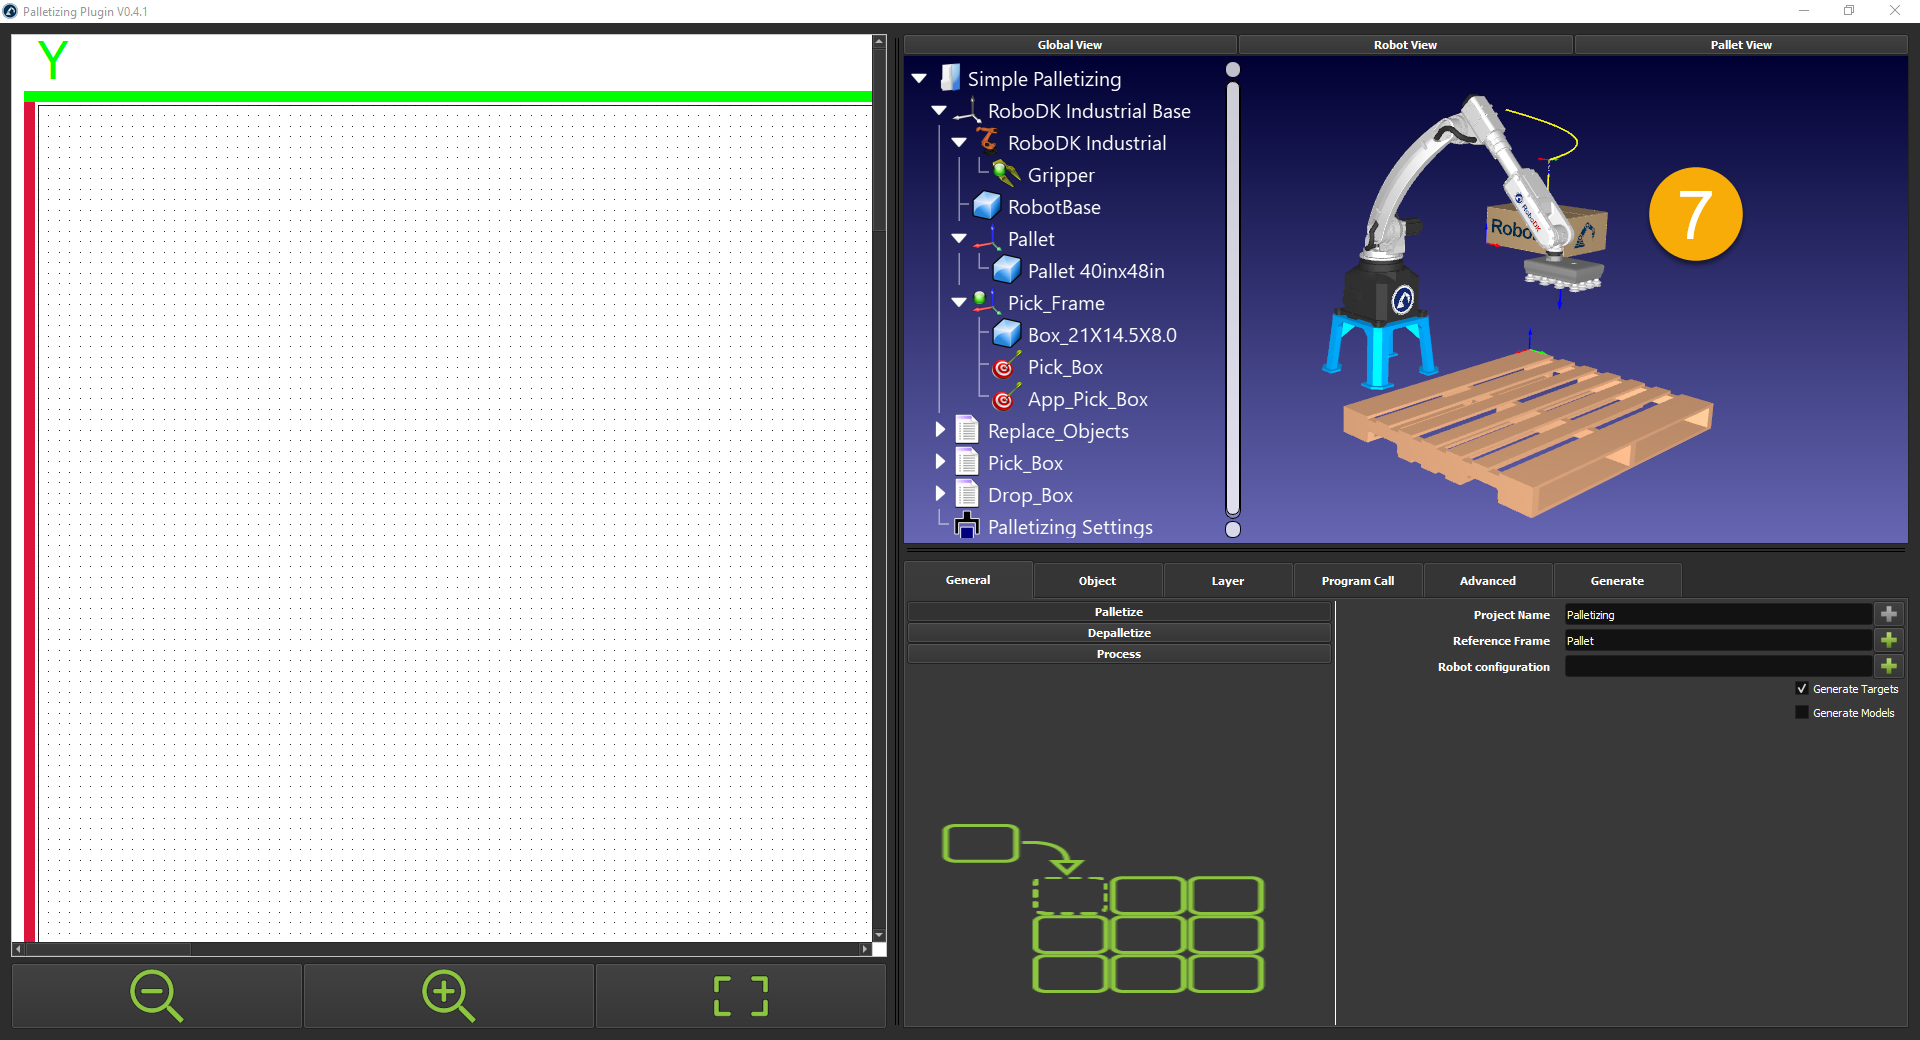
7.Using the 3D interface, move your robot near the middle of the pallet. This position will be used as a reference configuration for the robot pose.
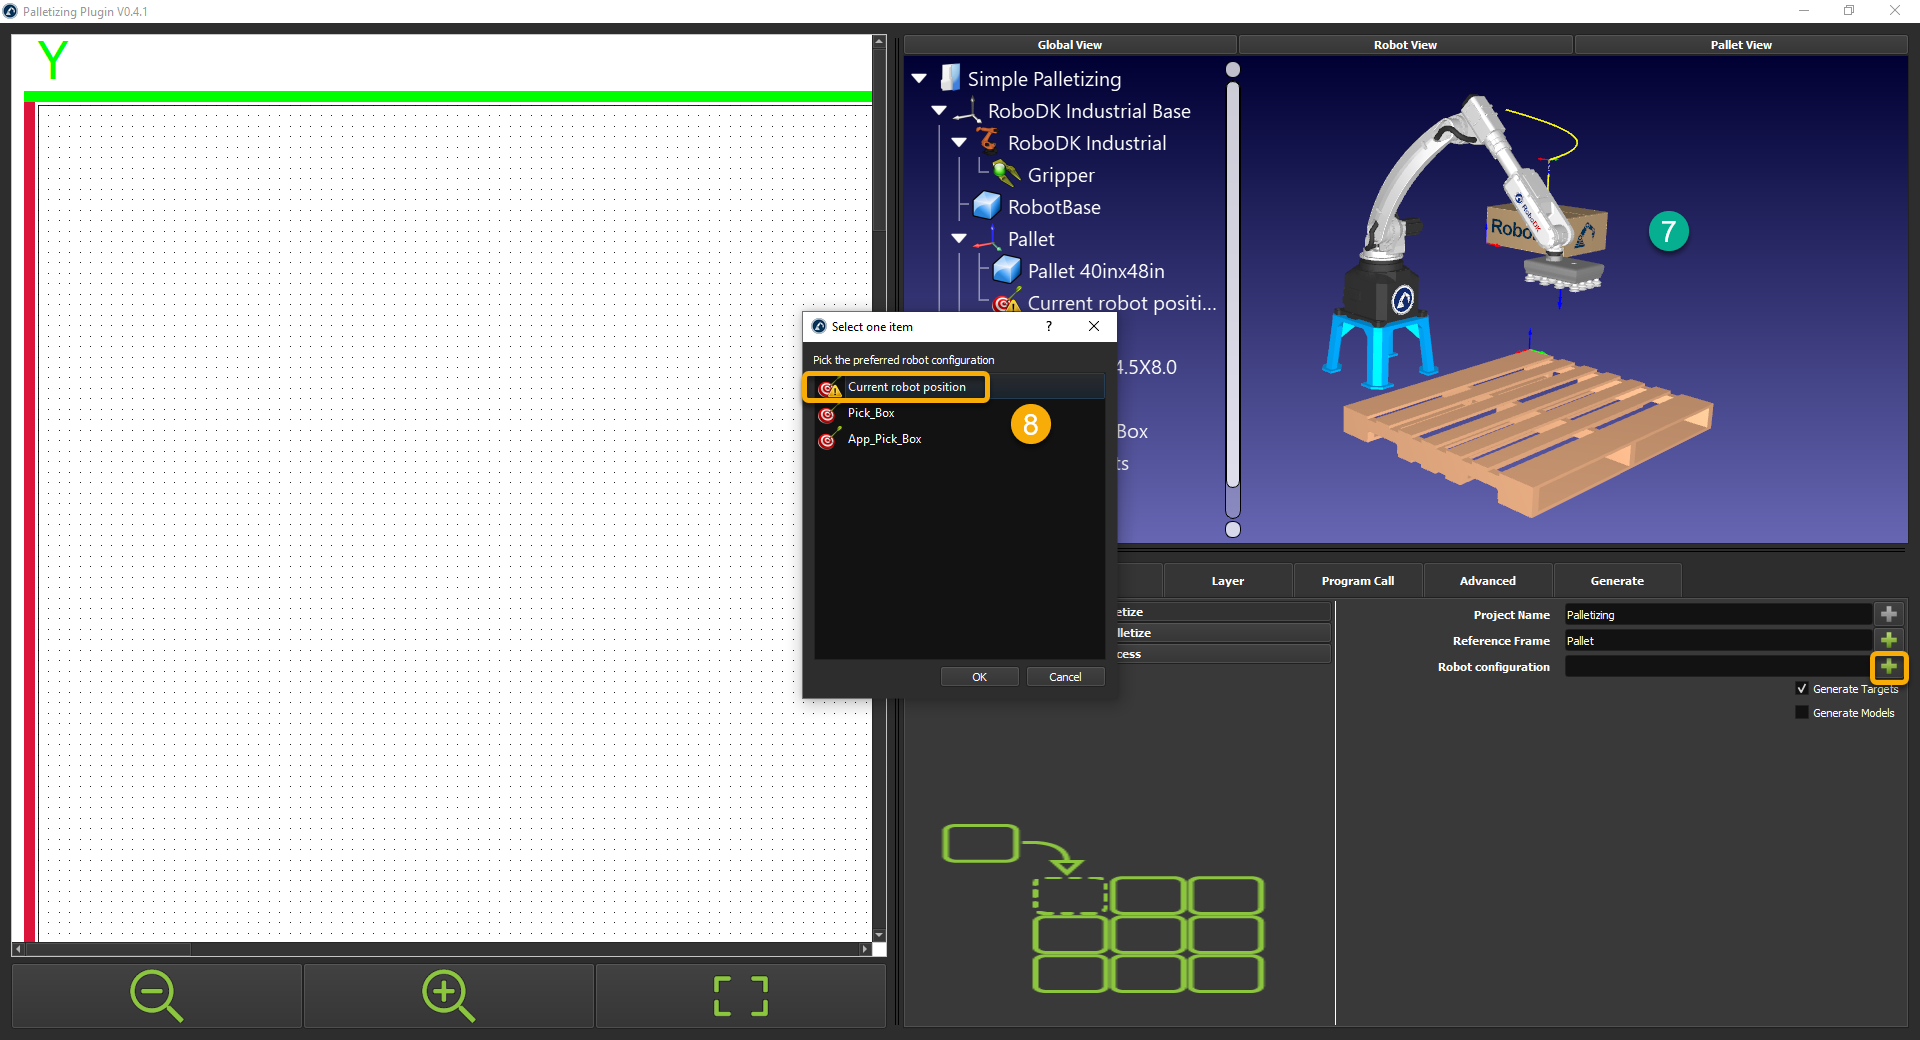
8.请按 ”+” sign linked to the机器人配置text box and selectCurrent robot position。Alternatively, you can also select an existing target.
9.对于托盘项目,请确保生成目标is checked andGenerate Modelsis not selected.

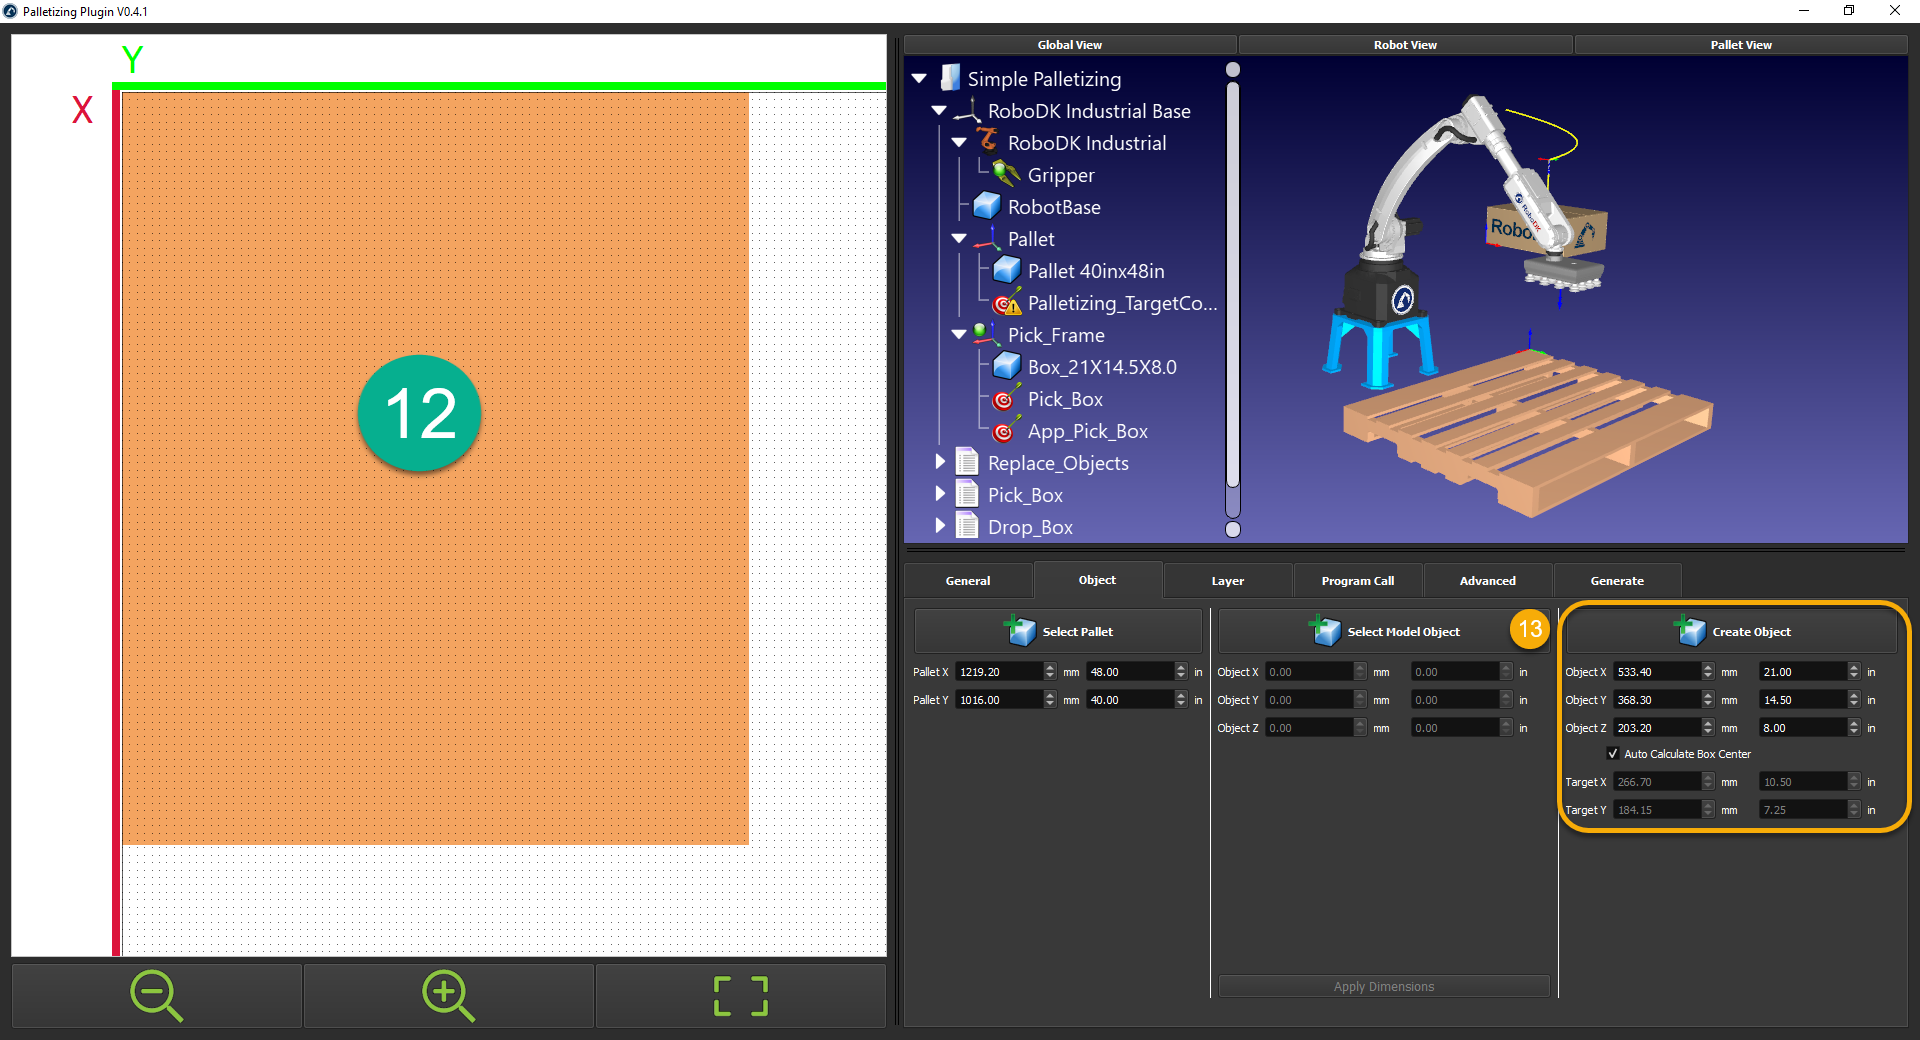
10.移至Object选项卡以导入所需的对象。
11.Select the pallet you imported in your RoboDK Station. Alternatively, if you don’t have the 3D model, you can simply enter the dimensions.
12.A 2D representation of your pallet will appear in the 2D interface. The X and Y axes should match with the X and Y axis of the Pallet reference frame of the 3D environment.
13.输入盒子的尺寸创建对象“。另外,您可以将盒子的3D模型定位到托盘参考框架上,并使用“Select Model Object“。This option will require you to select a target on top of the box. More details on that in a future example.
14.Once you click on创建对象, 4 boxes will appear on the left side of your screen. One box per possible 90-degree rotation. A red and a green line will show the rotation of the TCP around the Z axis.
The palletizing layers allow you to design how you want to place the objects on each layer of your pallet and properly define your preferred layout.
Follow these steps to create the layout of your layer:
15.移至Layertab to create your layer design.
16.Make sure your layout grid is set according to your need. In this case we will be using 0.5 inches.
17.Select a box from the left and drag and drop it on the pallet.
18.While moving the box on the 2D interface, it will appear in the 3D environment.

19.Create the layout of your first layer.
20.在每个位置添加相对方法和缩回运动。
21.The number represents the order in which the box will be positioned. You canright-click the box to modify the order.
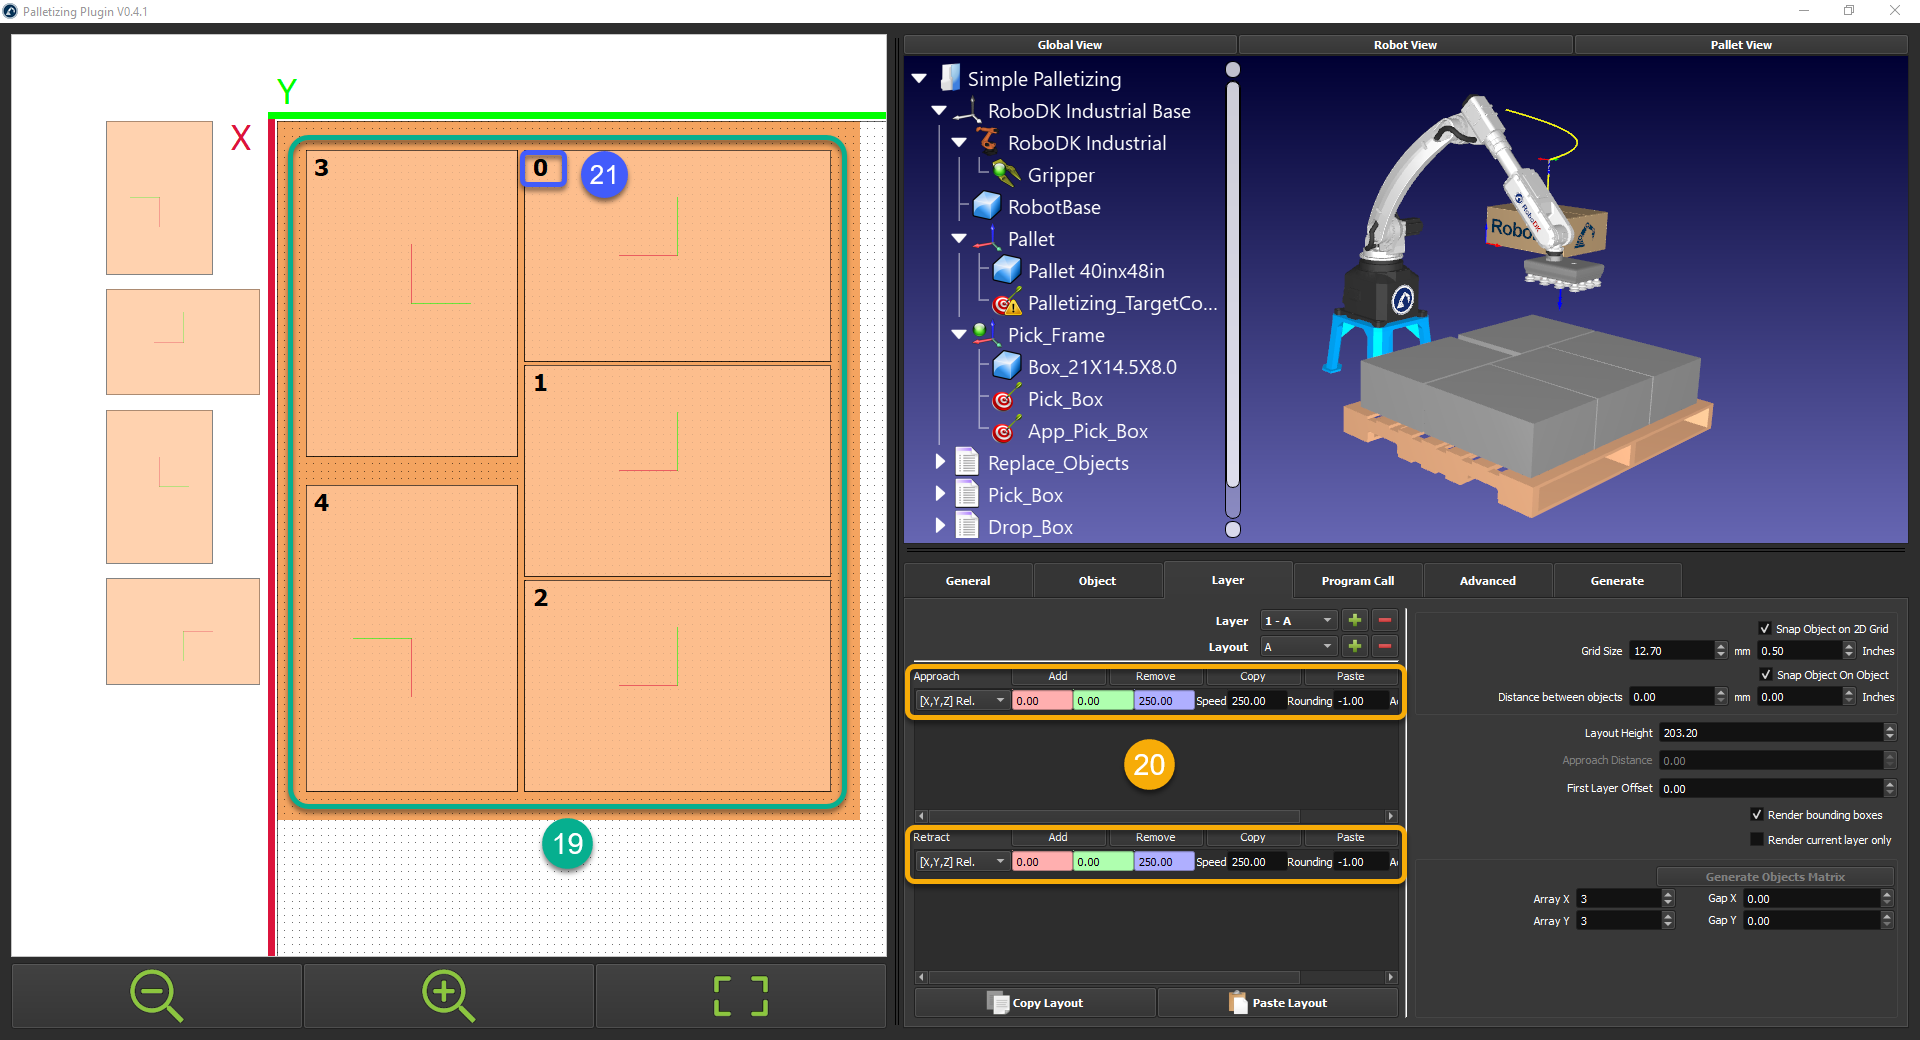
22.Organize your layer.
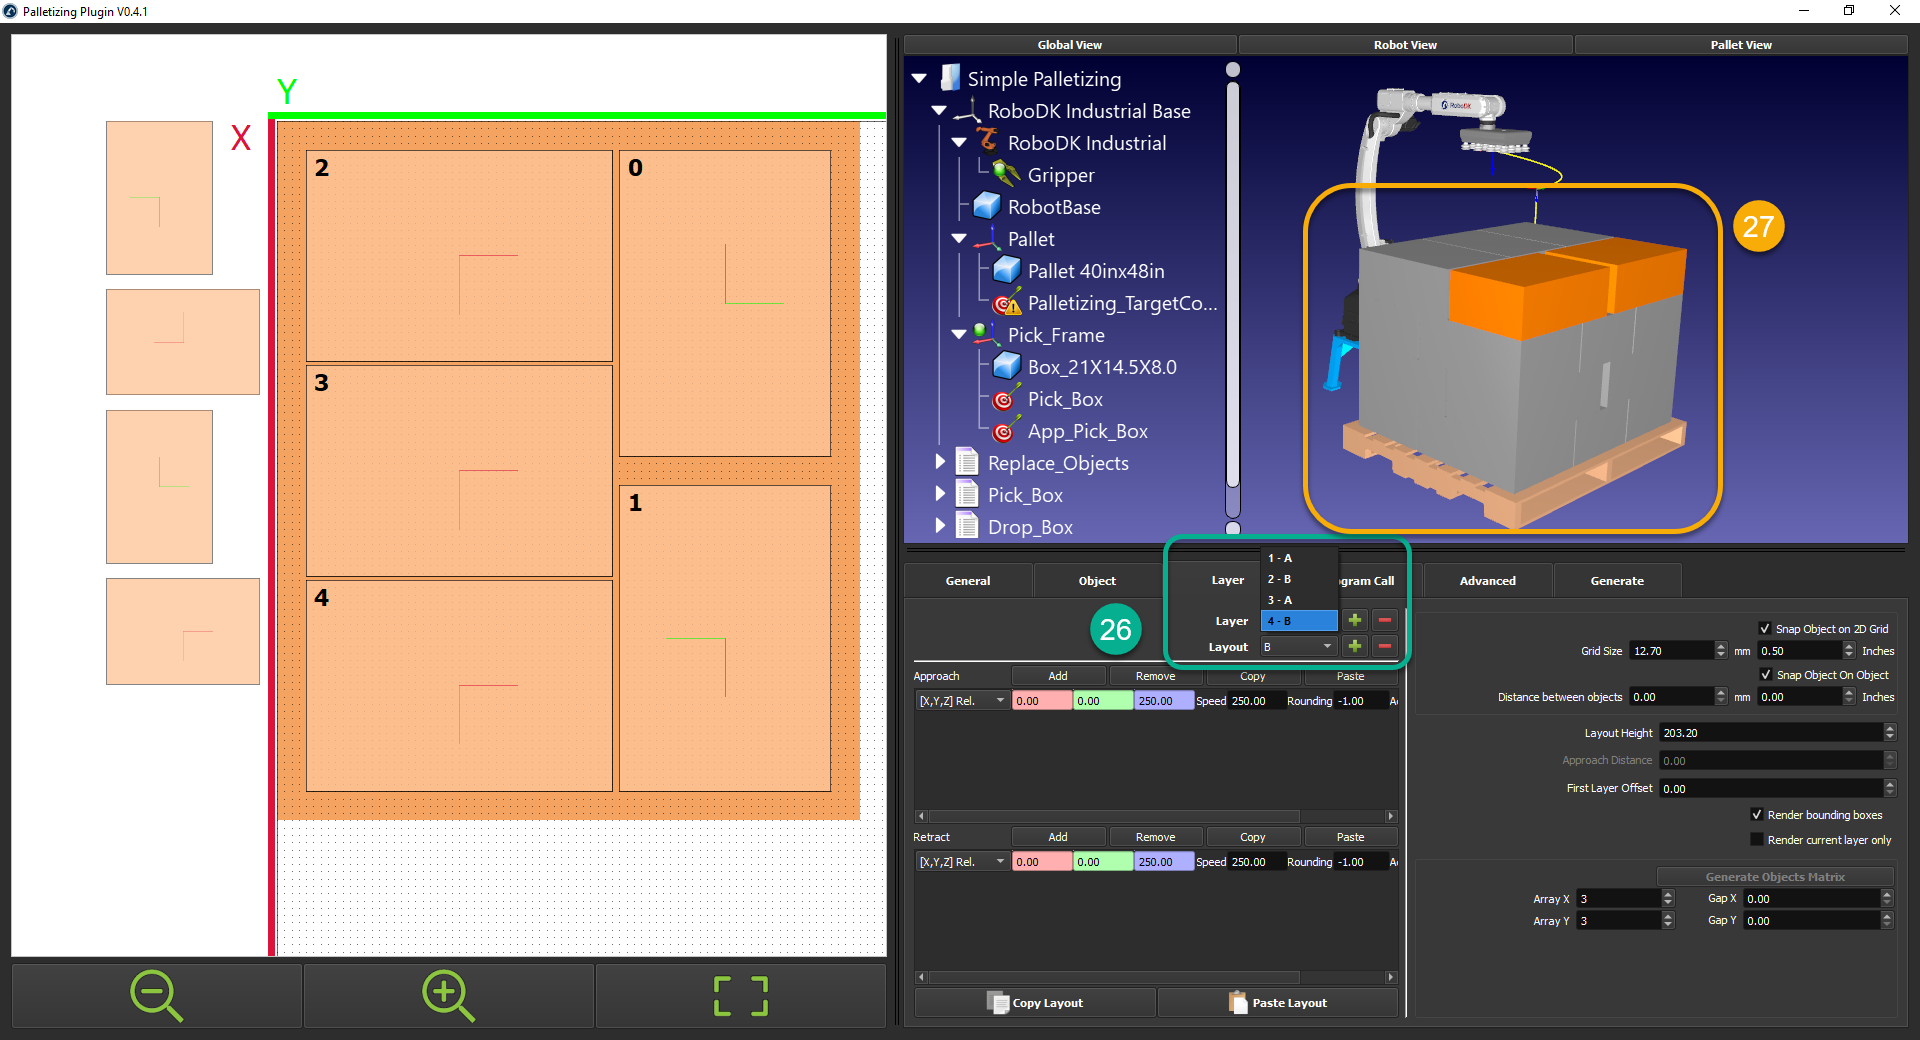
23.通过按“+” button. Adding a new layer will copy the same pattern as the layer under it.

24.您可以通过按“+” side linked to the layout menu.
25.创建您的替代布局。
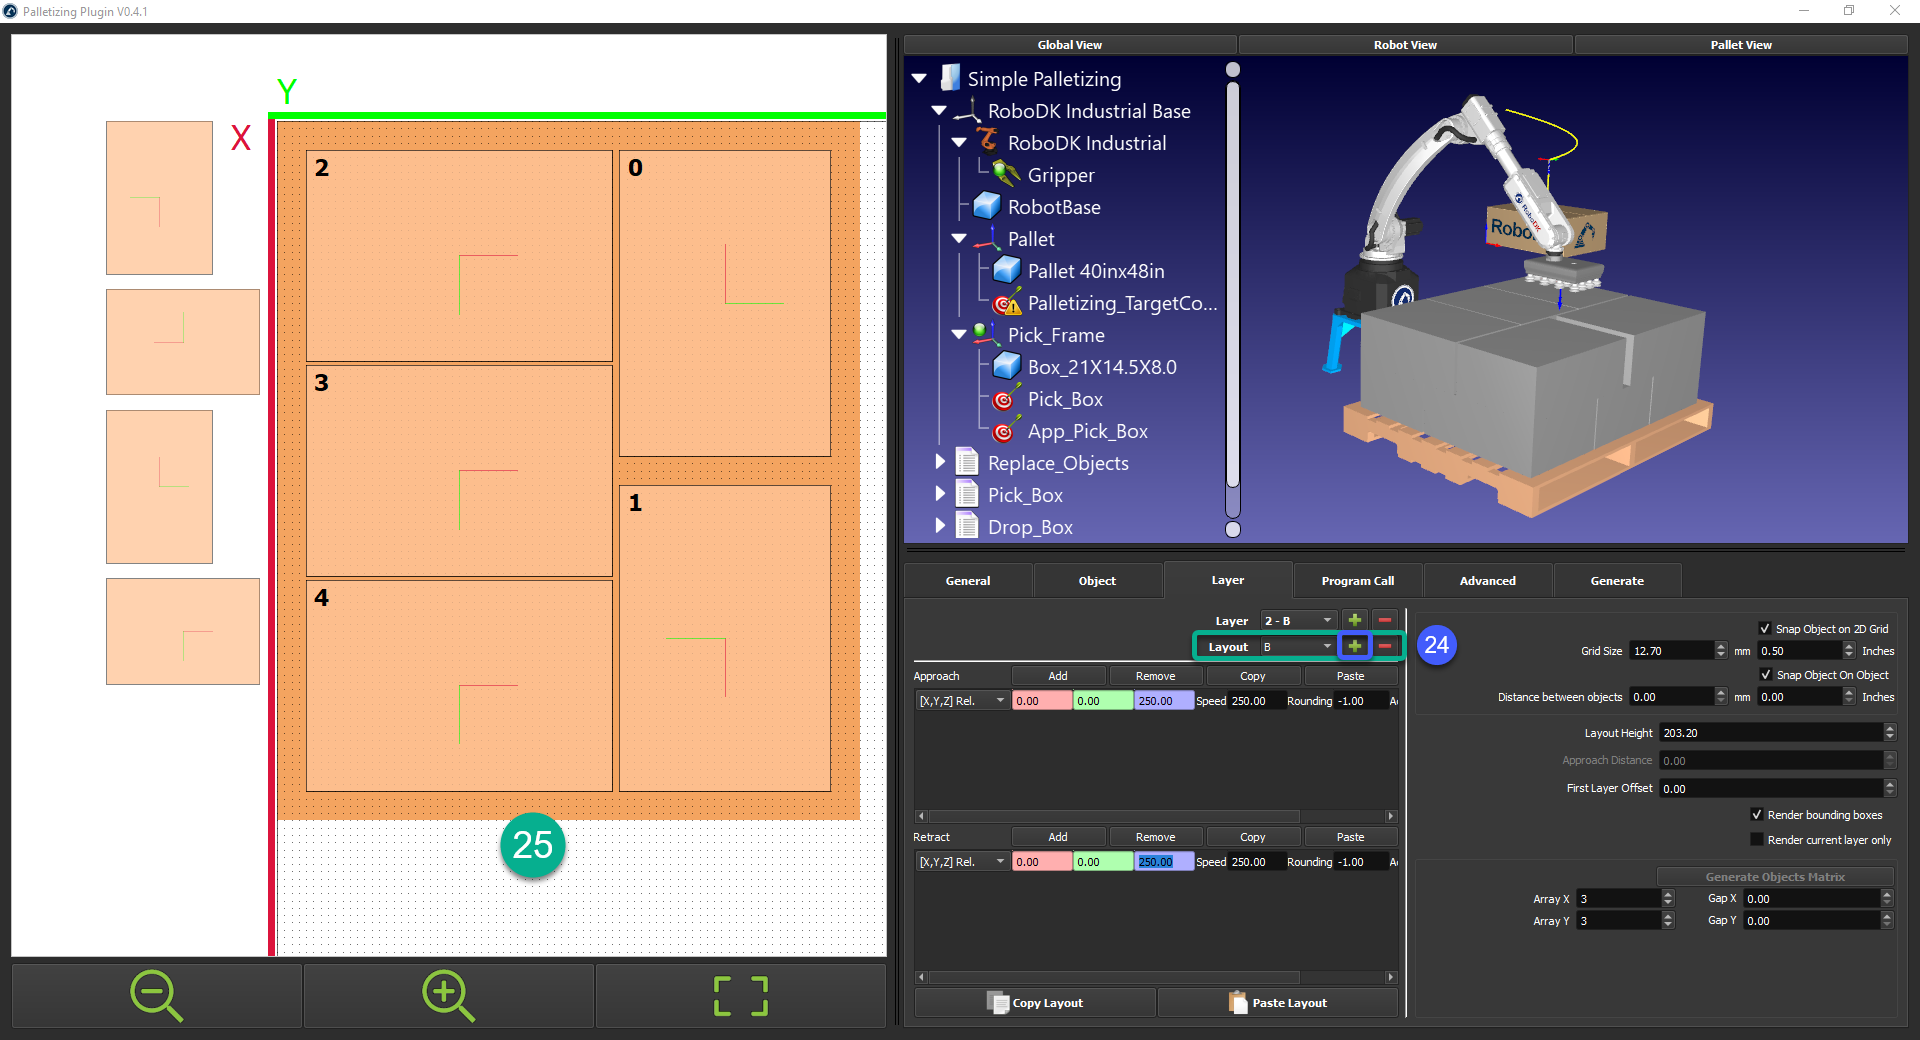
26.Organize your Layer the way you need them. In this case we alternate betweenLayout AandLayout B。
27.Make sure all your boxes are within reach of the robot.
Once you have created the palletizing project you can generate the robot program that needs to be executed on the robot controller.
28.移至“计划呼叫” tab to add specific event at the beginning of your program; when the robot needs to pick a box or when it needs to drop a box.
29.对于此示例,激活“Program Start”, “Box Grab”, and “盒子释放“。
30.You can tip in the name of the subprogram you want to use, or you can press the “+” button to select it from a list.

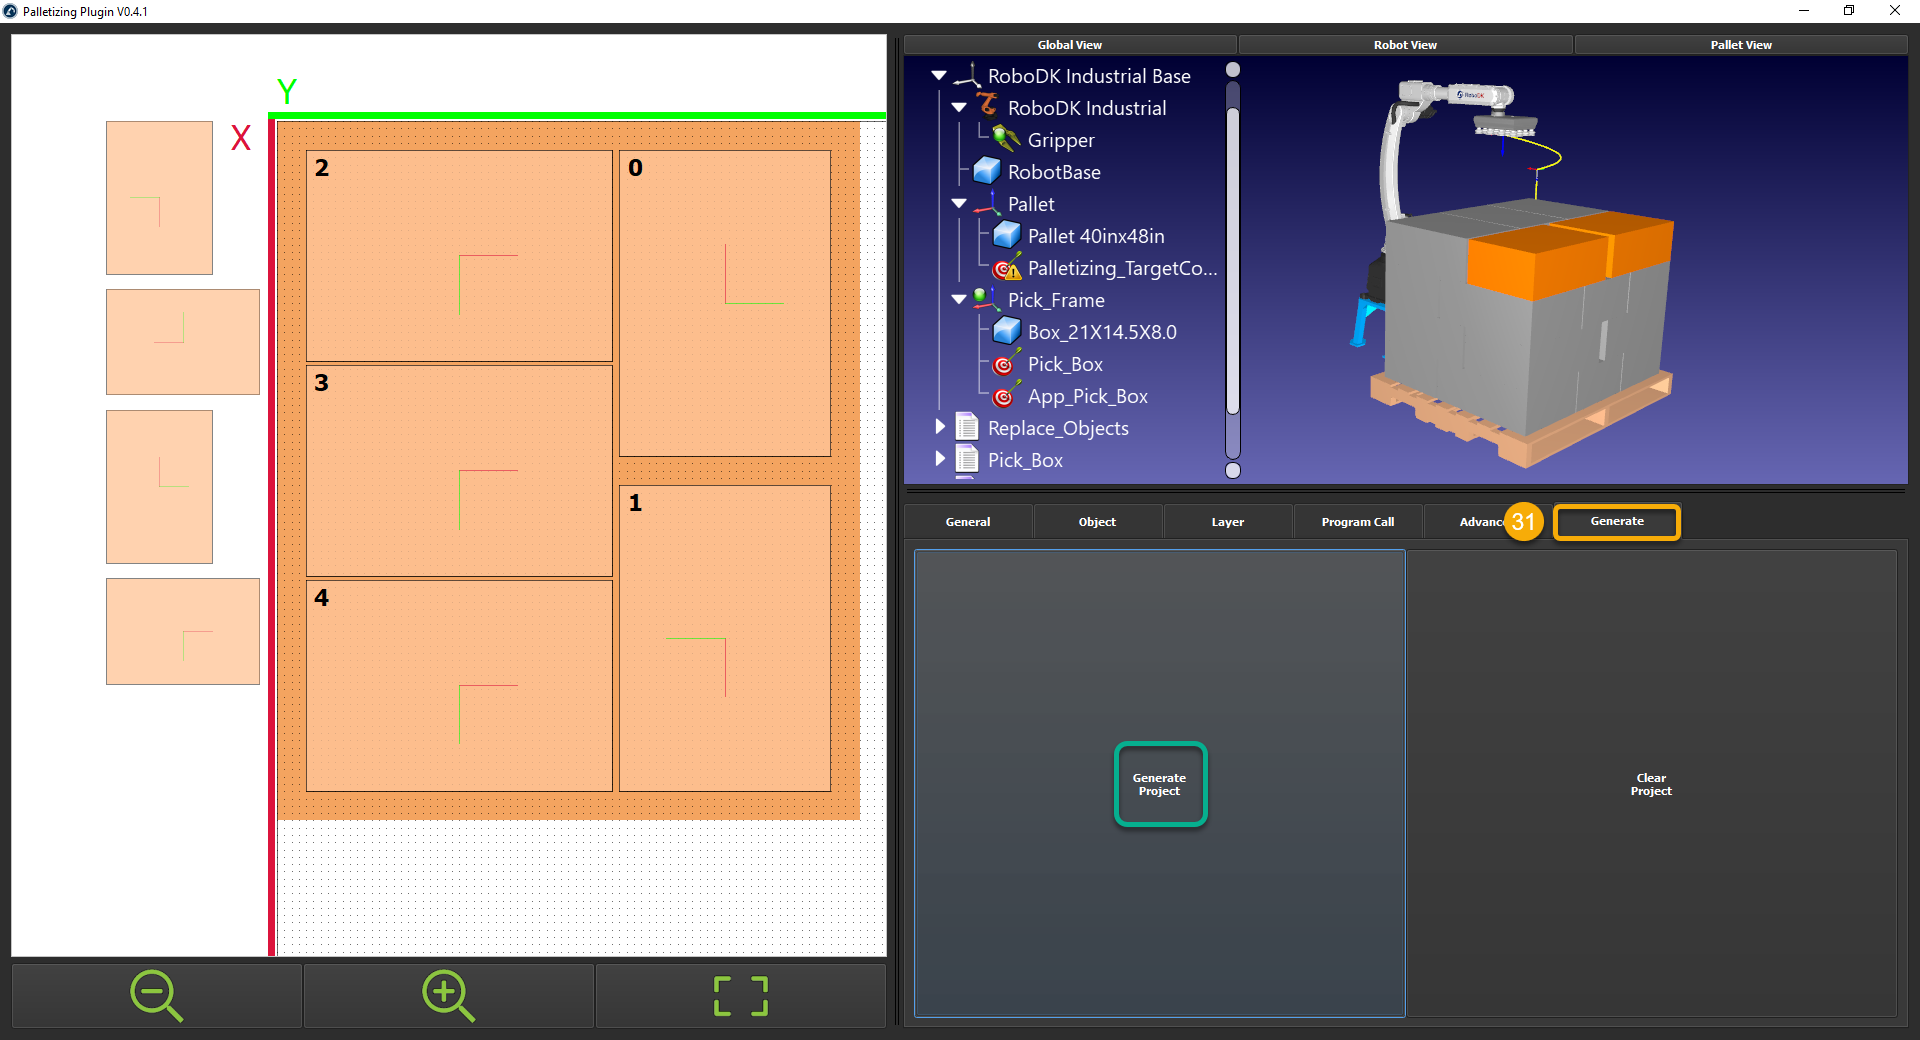
31.移至“Generate”标签并生成程序。关闭托盘窗口以返回Robodk的界面。
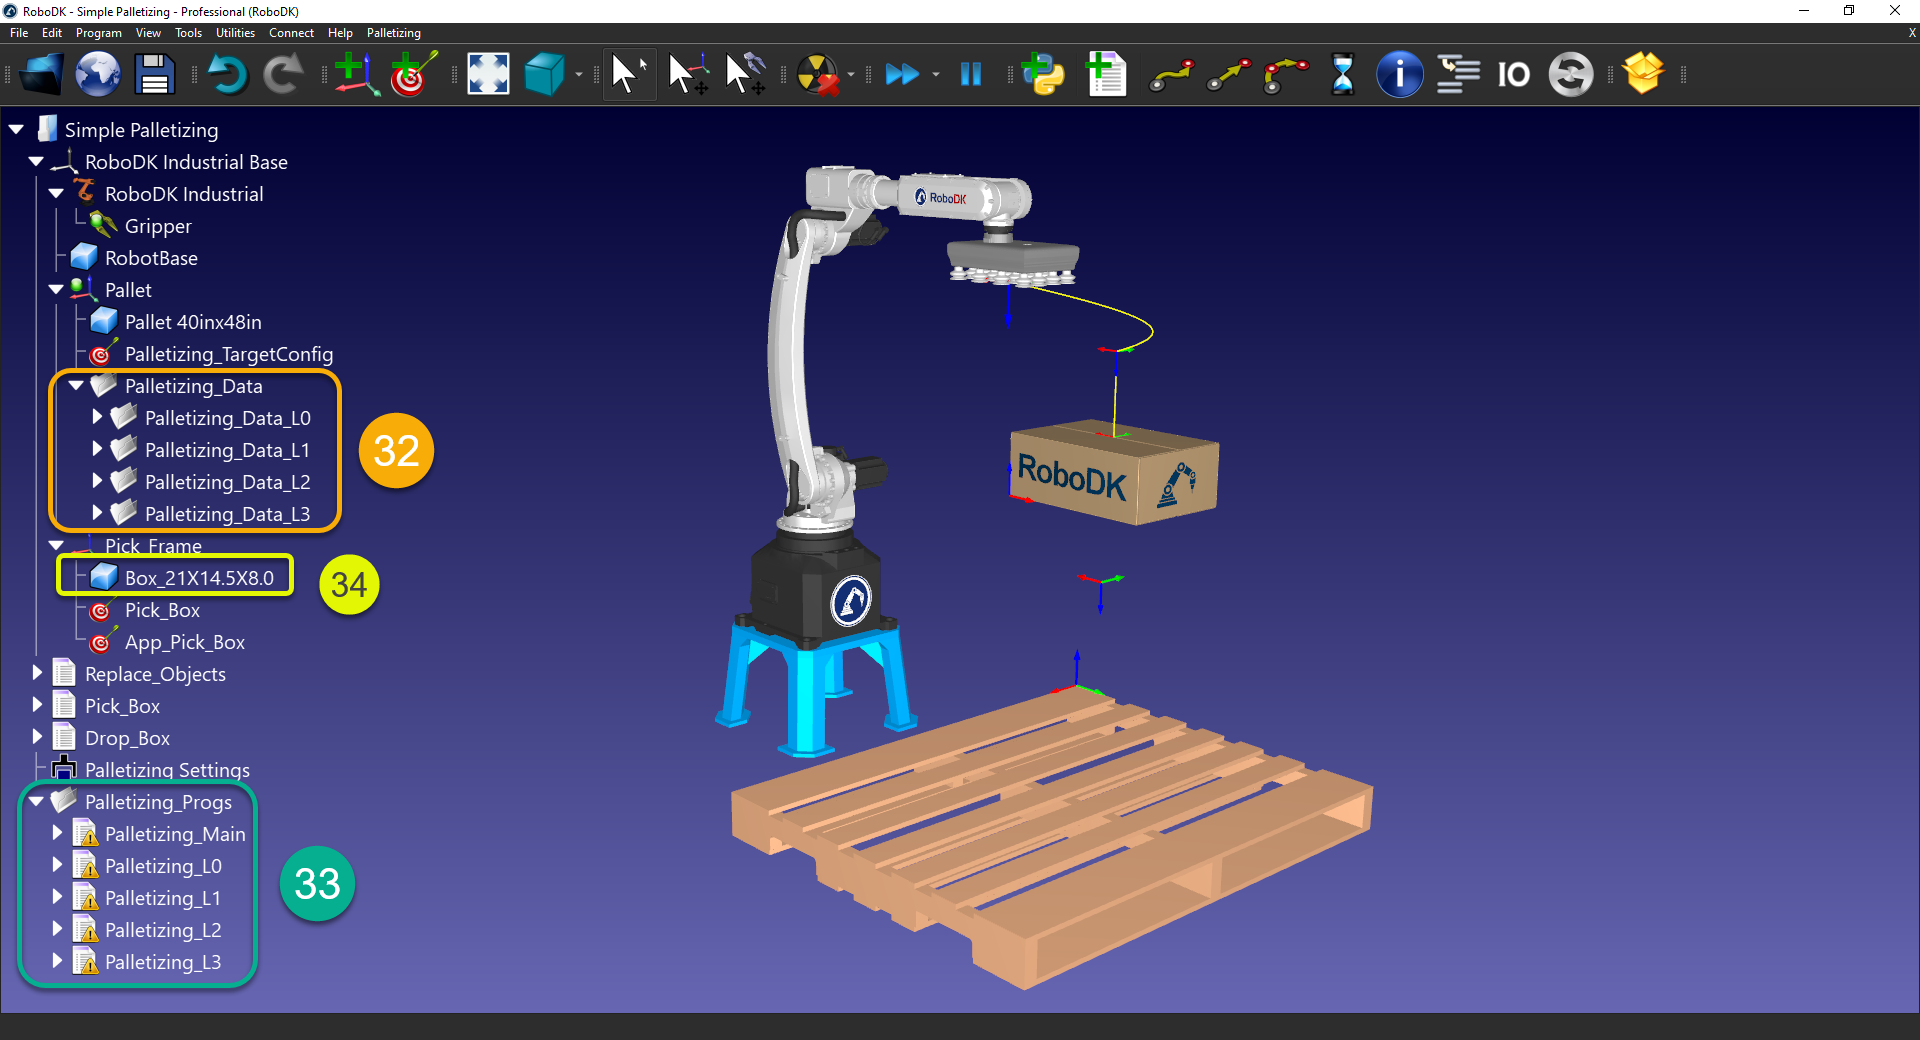
The palletizing plugin created a lot of items in your station folder including all the targets to reach.
32.文件夹在“Pallet” frame with contain the targets. They are invisible by default but can be made visible like any other targets.
33.A folder will contain the Main palletizing program and a subprogram per layer.
34.您需要创建足够的盒子来喂养托盘项目。复制并粘贴您的盒子,并根据需要的盒子贴上任意数量的盒子。
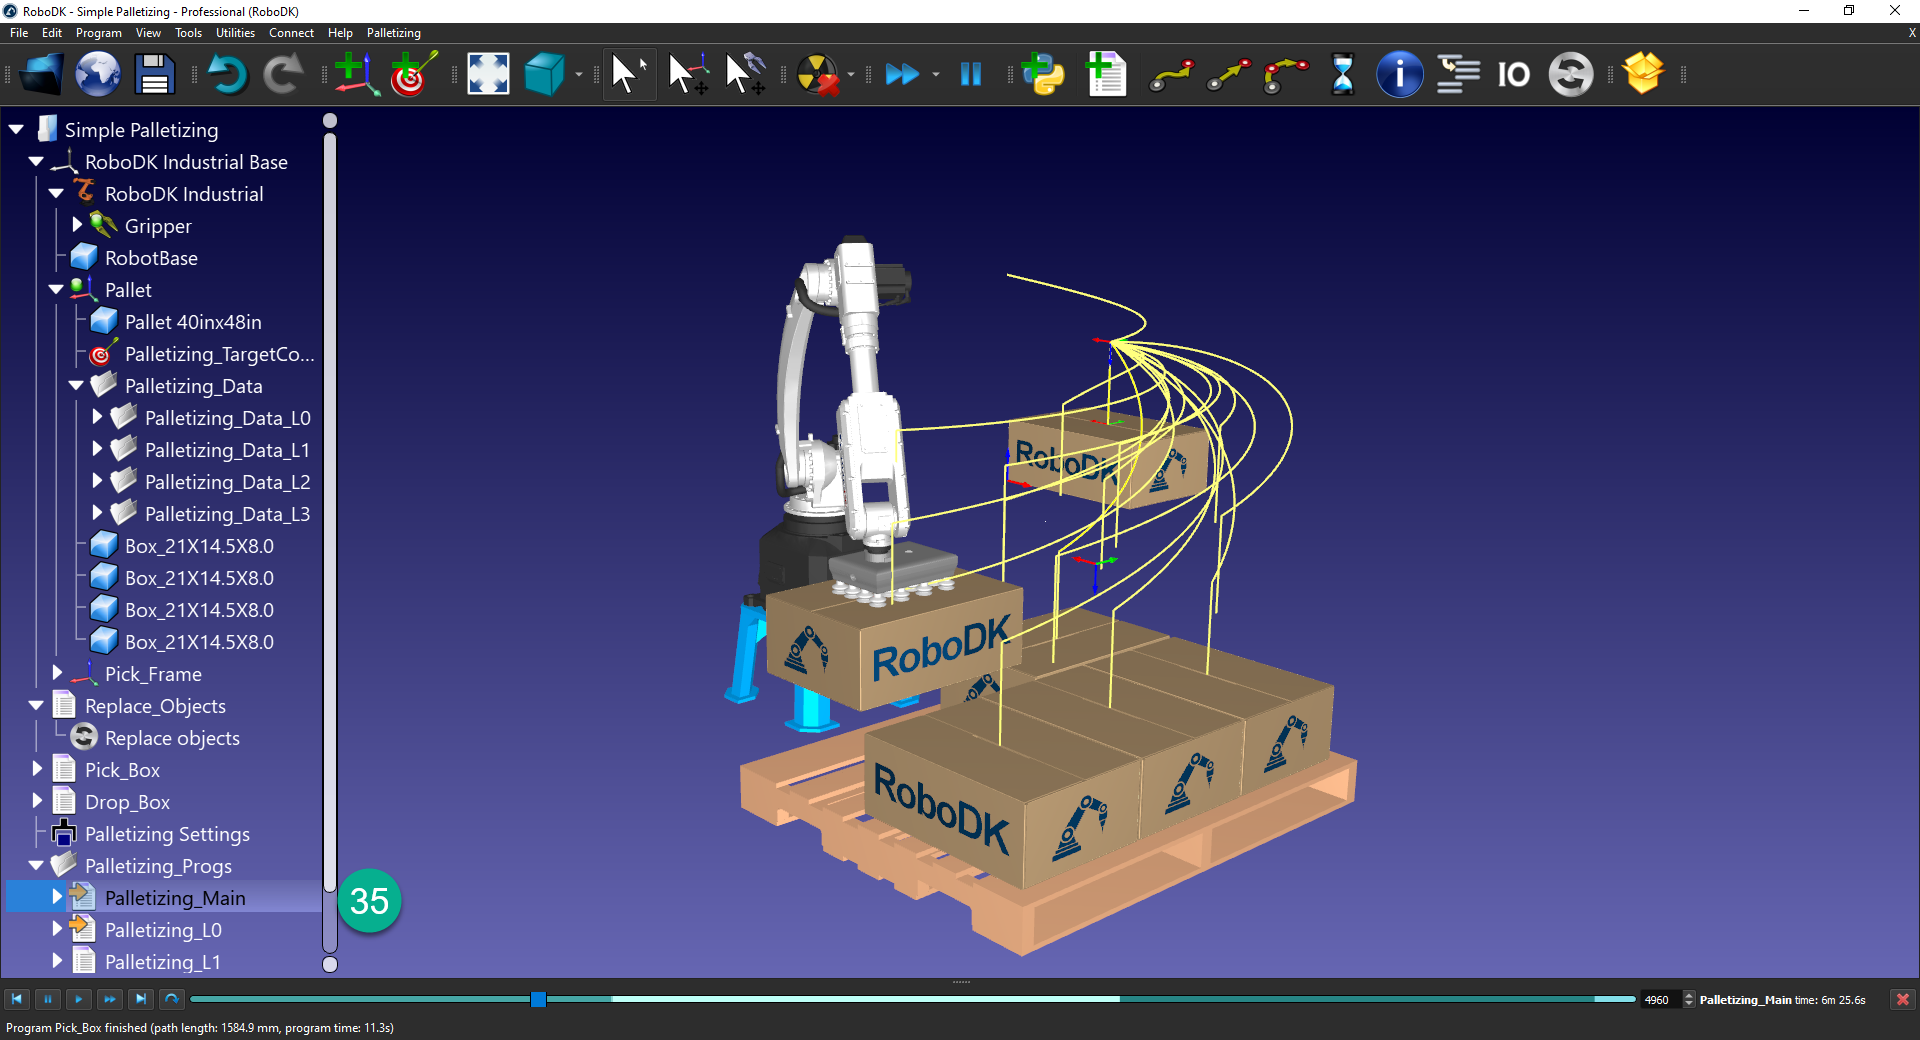
35.双击“码垛_Main”运行主要程序。
36.If a target is unreachable, RoboDK will let you know (as shown in the image below).

37.Find the unreachable targets in the list. If the “Pallet”参考框架已激活,您应该看到一个warning signon the unreachable target (as shown in the image below).

38.使无法达到目标的目标可见,然后按“Alt” and move them to a reachable spot.

39.Right-click the “码垛_Main” program and select “Generate robot program” to create the program your robot controller can execute.
